第1回 Play2.3 入門
2014.12.03

Play2.3 入門 第1回
長らくお待たせしました、多忙だったので記載できてませんでした。
ダウンロードしよう
まずダウンロードしましょう
本家サイトよりactivatorをダウンロードしてきます。
Play Framework
Play Framework Download
現在だと下記のようなZIPファイルがダウンロードされます。
typesafe-activator-1.2.10-minimal.zip
2.2.x系ではplayコマンドにて作業をしておりましたが、2.3.x系からはactivatorに変わったので、こちらを使って行きましょう。
ダウンロードした、ZIPファイルを適当な所に解凍します。
Windowsの方はC:¥Program Filesの下がいいのではないでしょうか?
Macの方は/Applicationとかですかね。
解凍したファイルに対して環境パスを設定しておくと便利です。
さて、これにて準備は完了です。
インストールしよう
Play FrameworkはCUIによる操作がメインでしたが、activatorによってGUIもサポートされました。
せっかくですので、まずはactivatorの優れたGUIを試してみましょう。
先ほど配置したtypesafe-activator-1.2.10-minimalの中の「activator」を起動します。
Windowsの方は
C:¥Program Files¥typesafe-activator-1.2.10-minimal¥activator.bat
を実行するとコマンドプロンプトが立ち上がりデフォルトブラウザに表示されます。
Macの方は
/Application/typesafe-activator-1.2.10-minimal/activator
を実行するとターミナルが立ち上がりデフォルトブラウザに表示されます。
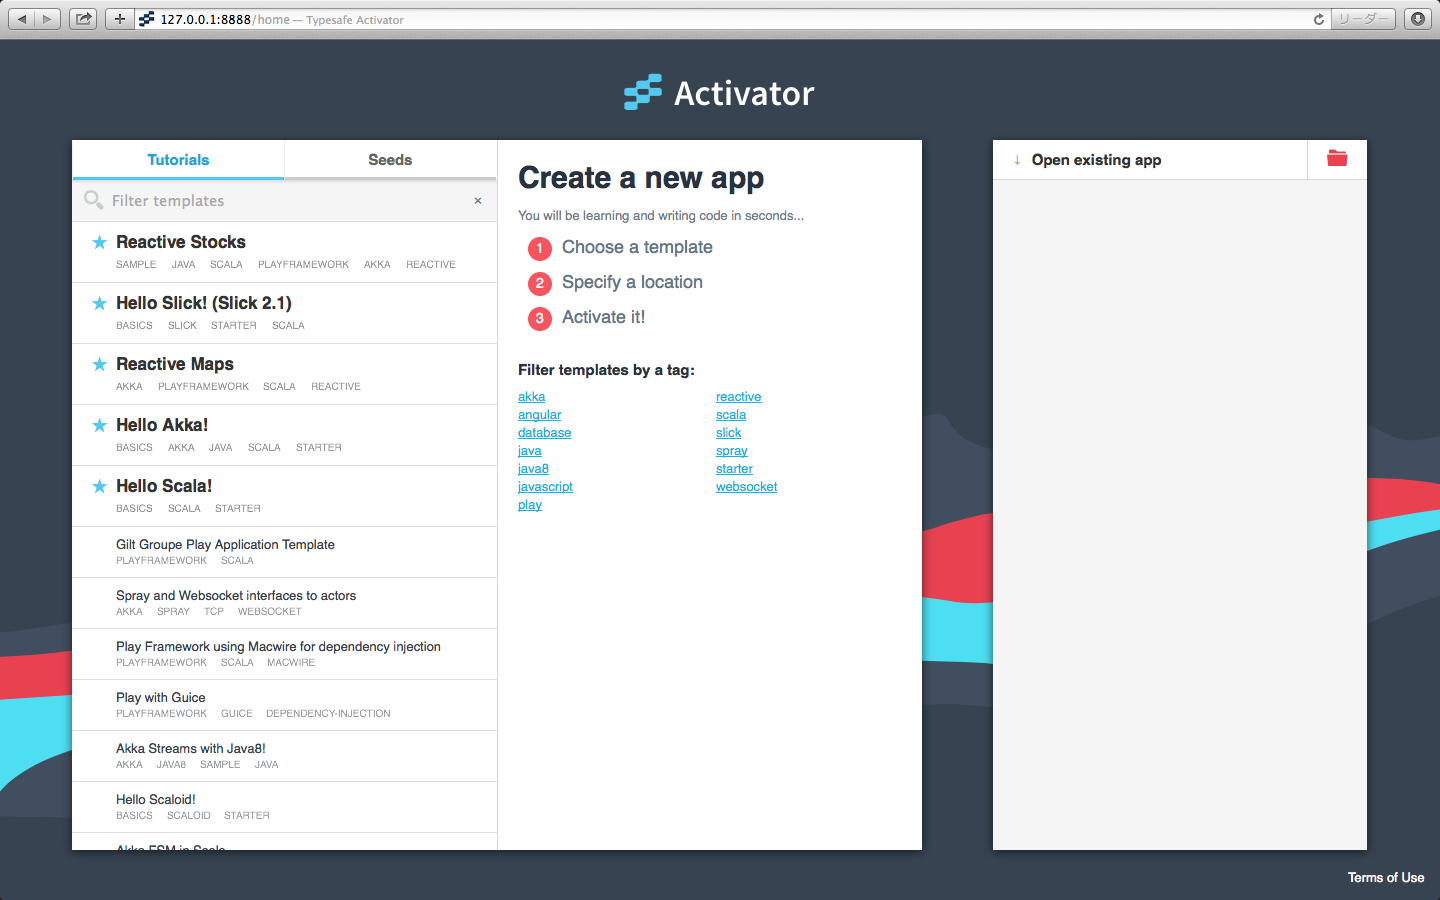
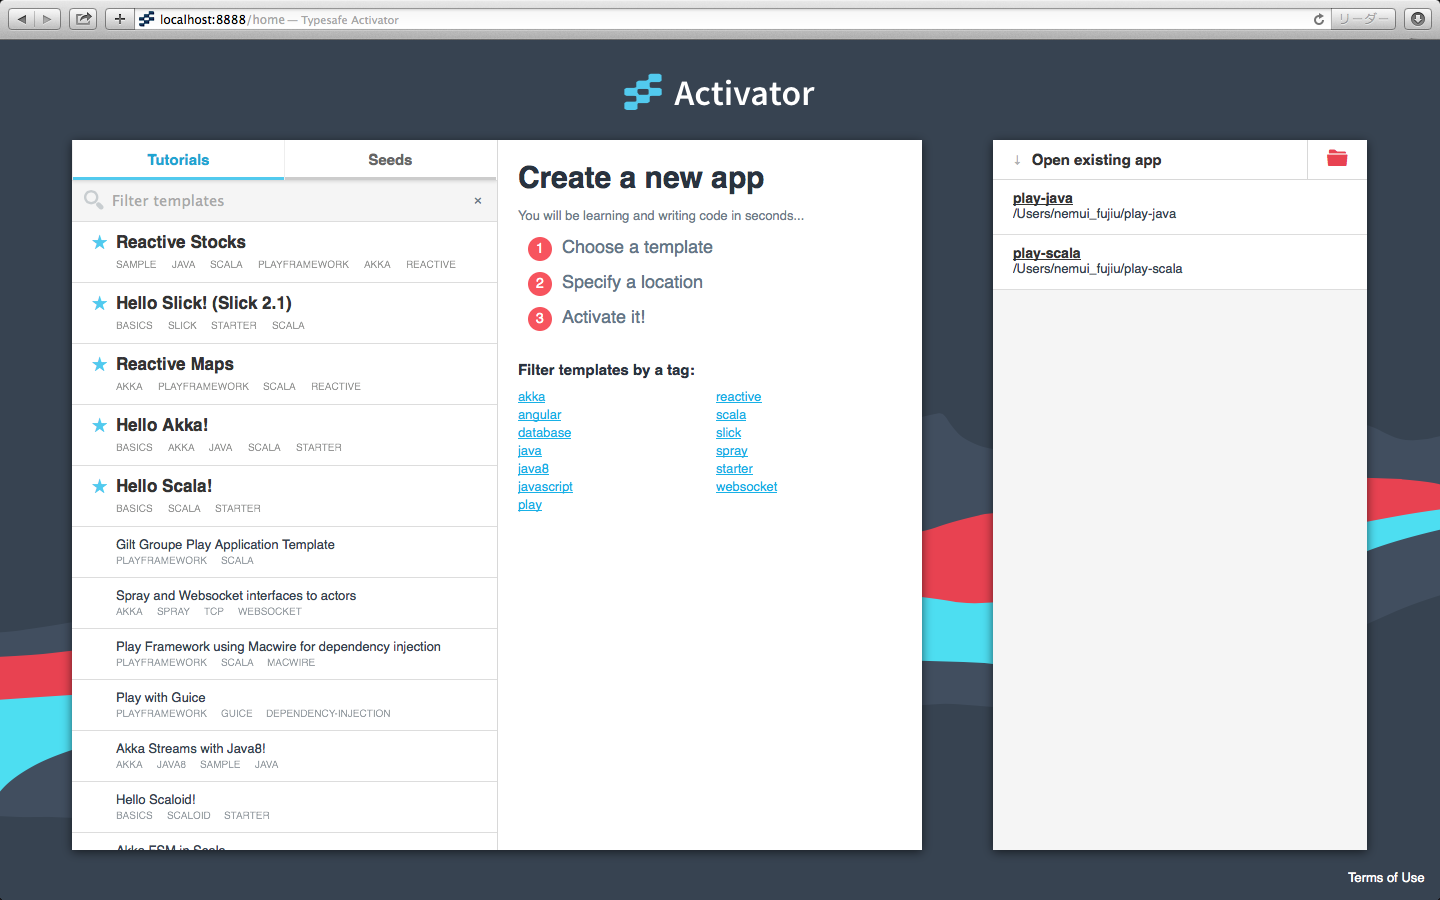
こんなような画面が立ち上がったと思います。
アプリケーションを作ろう
それぞれTutorialやSeedの一覧が表示されていますので、開発に適した物を選んでご利用ください。
今回は下記の2つを試してみます。
・Play Scala Seed
・Play Java Seed
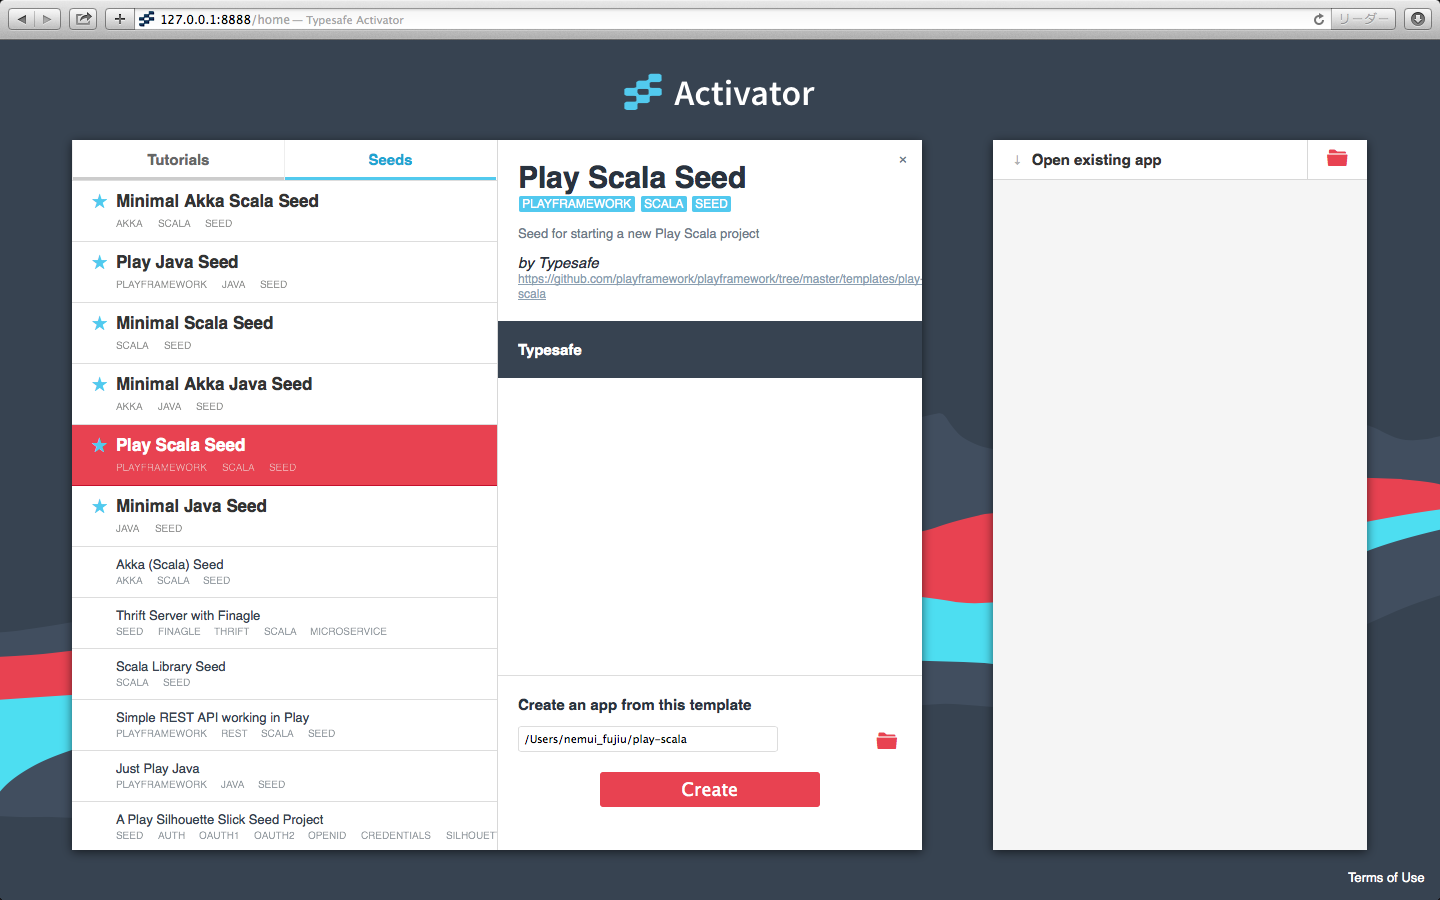
それぞれSeedタブから目的のプロジェクトを選択して、「Create an app from this template」にアプリケーションの作成先パスを記載します。
アプリ名をデフォルトの「play-scala」のまま作成するので、「/Users/nemui_fujiu/play-scala」に作成します。
「Create」ボタンを押して新規作成してください。
※初回作成には数分かかることがございます。
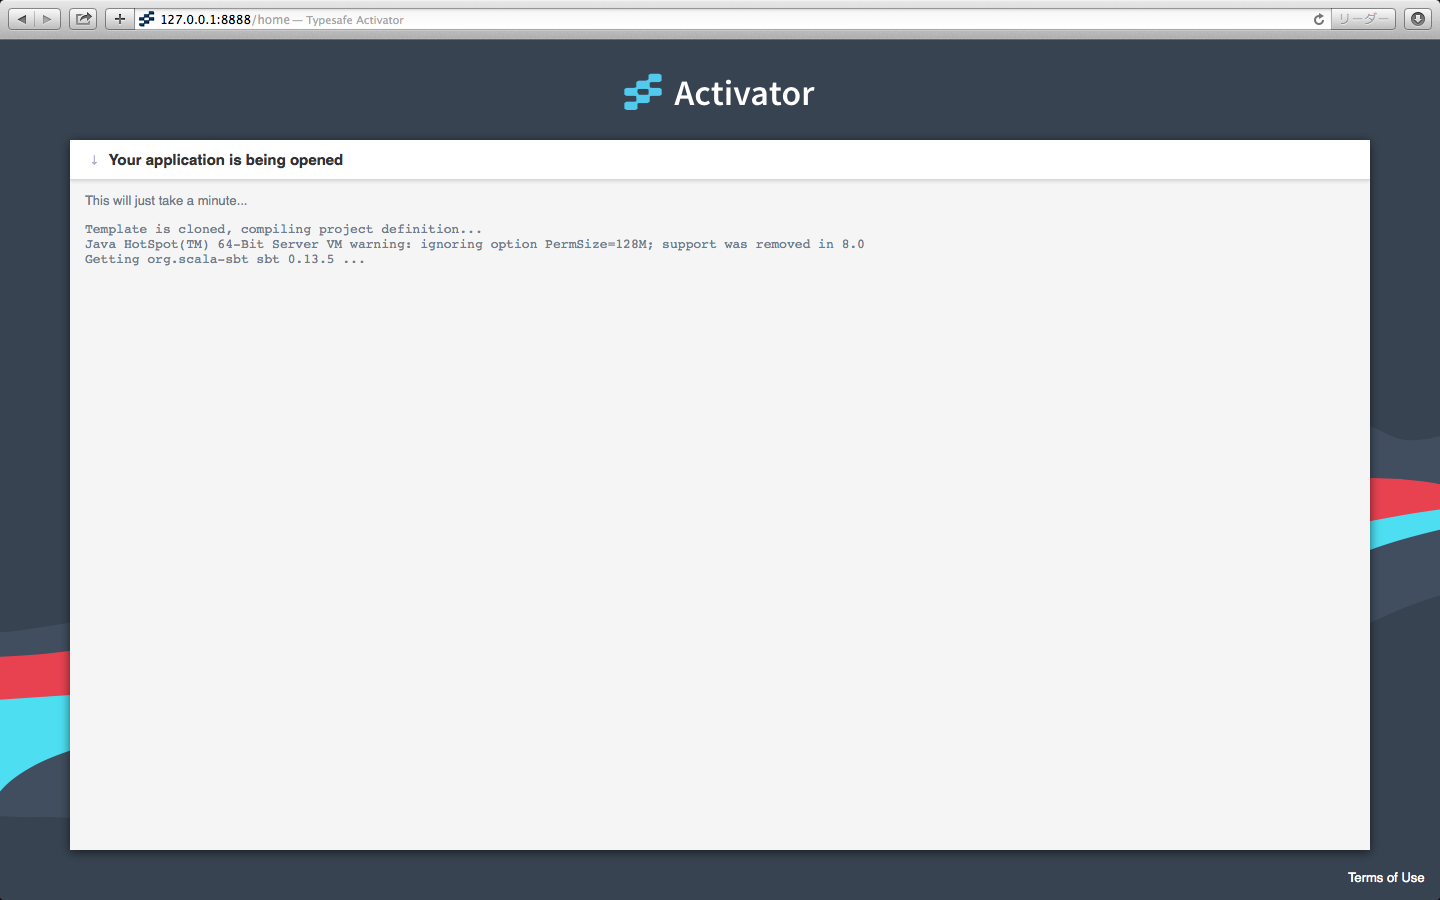
作成が完了したら、自動的にプロジェクトが立ち上がります。
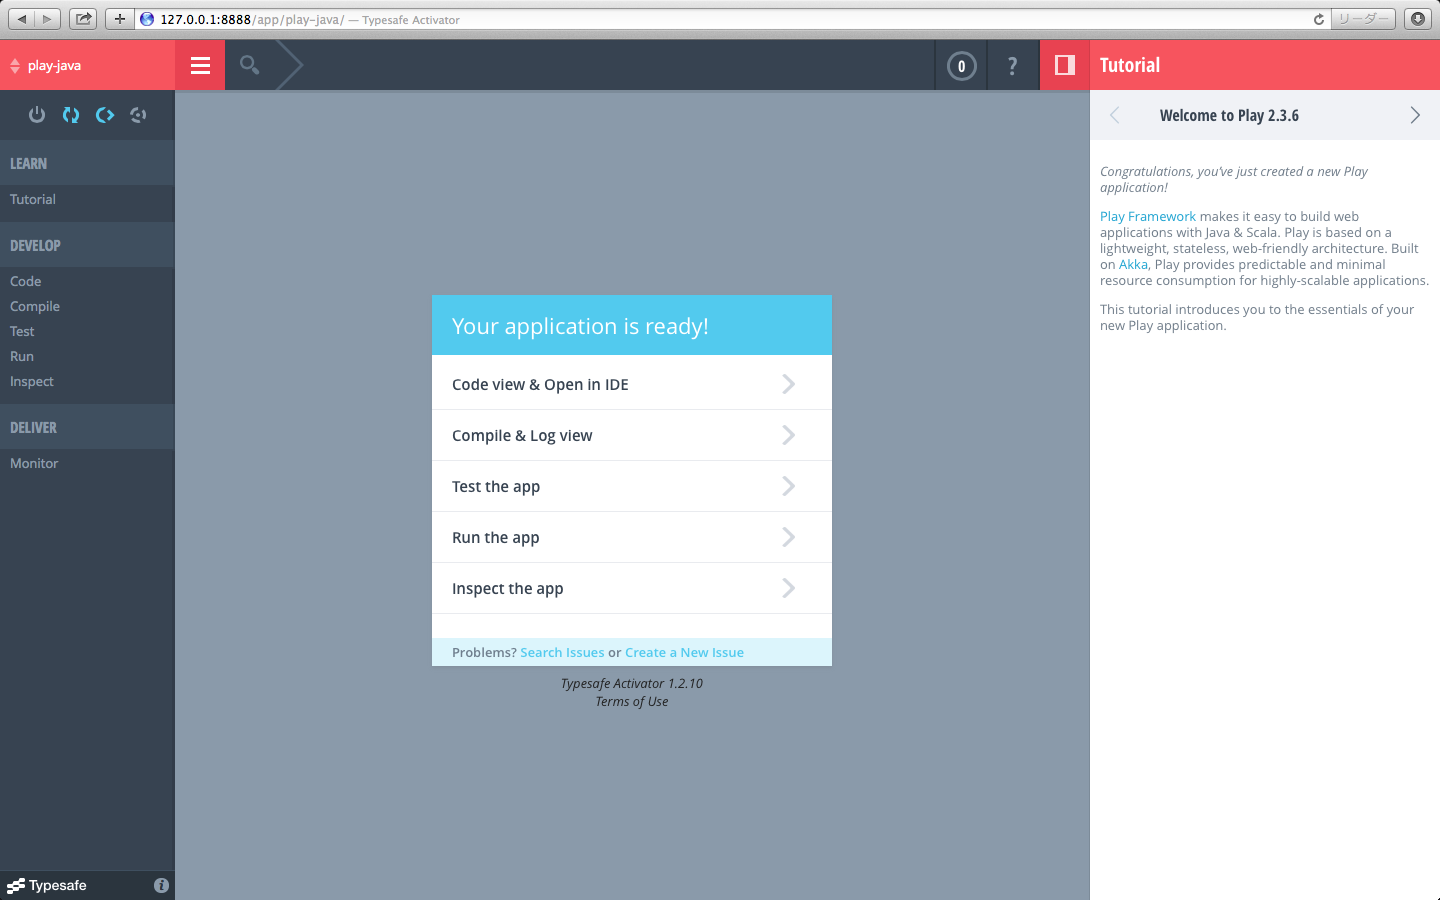
立ち上がらない場合はActivatorの右側に「Open existing app」として作成したプロジェクトの一覧が表示されているので、そちらをクリックしてください。
※下の画像は、play-javaも実行した後
実行してみよう
では一度動かしてみましょう。
「run app」を選択して「Start」をおしてください。
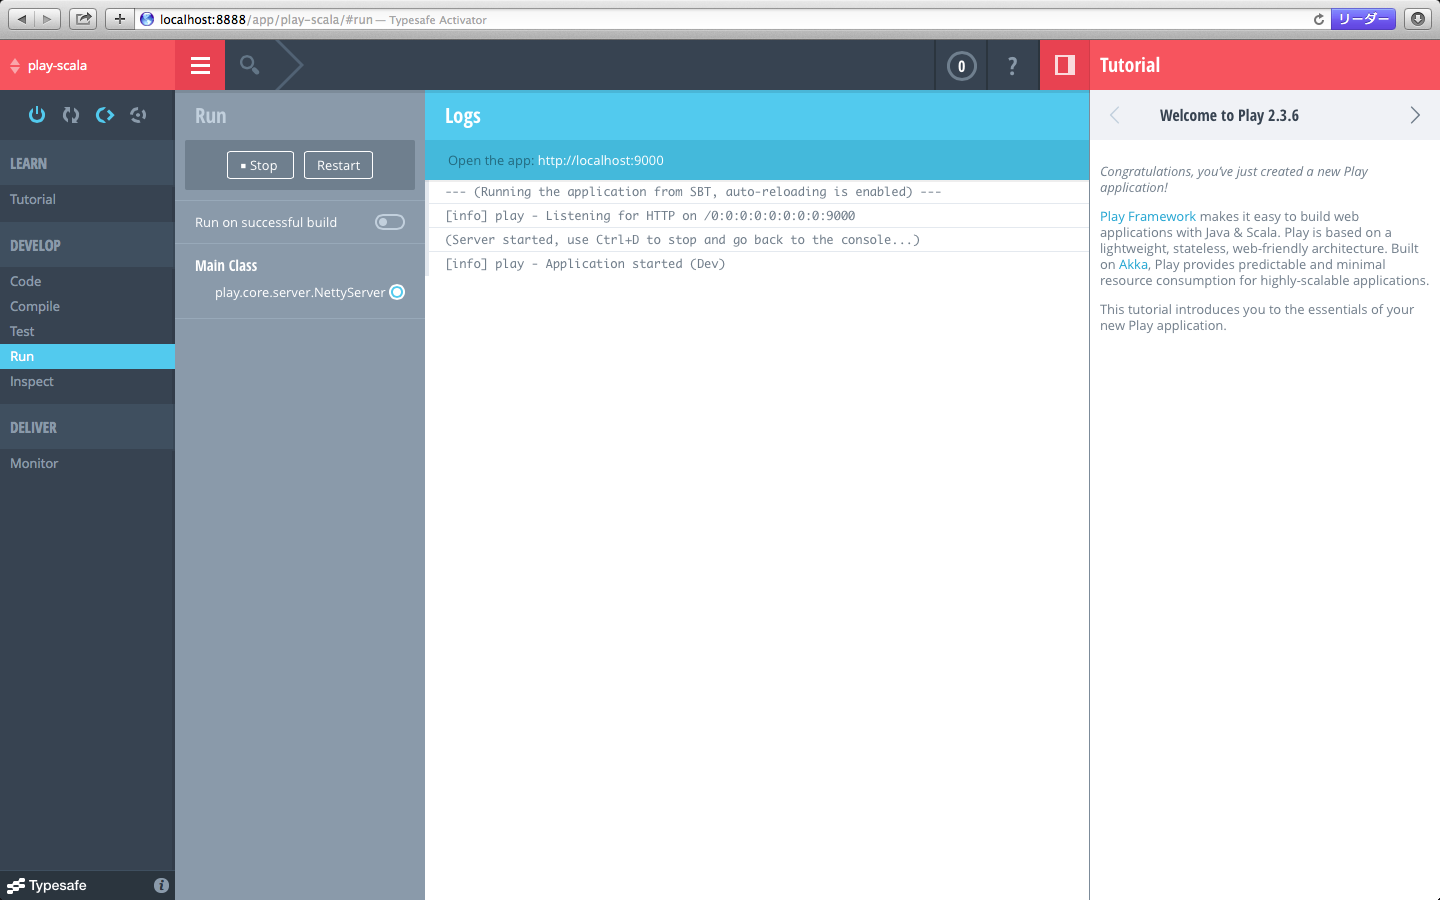
バックグラウンドでアプリケーションが立ち上がります。
「Logs」に
[info] play - Application started (Dev)
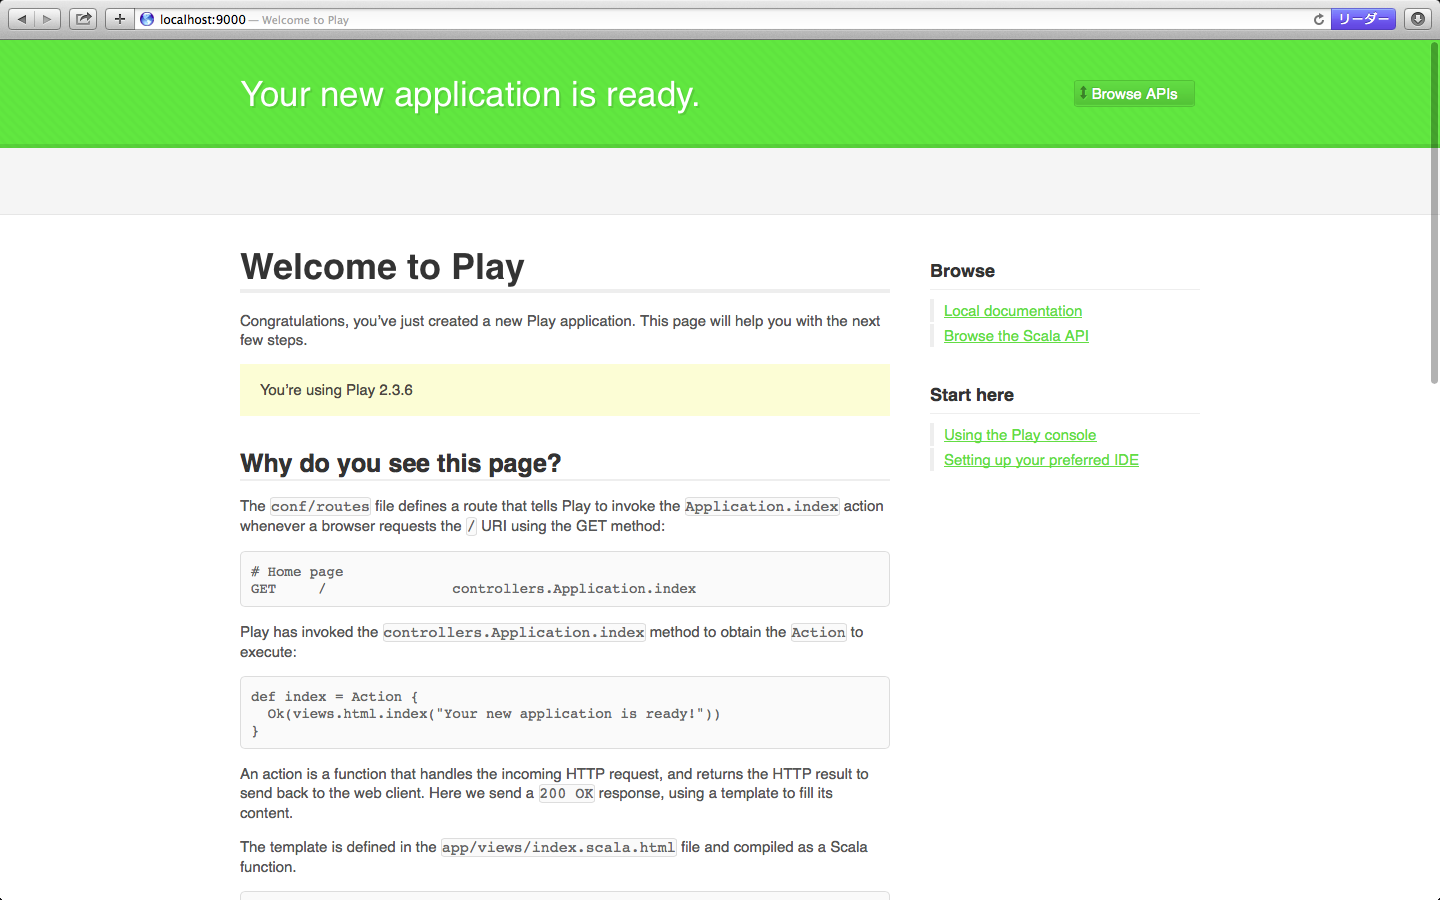
と表示されれば正常に起動しているので下記にアクセスしてみてください。
http://localhost:9000
※初回はコンパイルが走るため時間がかかる場合があります。
ちゃんとアプリケーションが起動しました!
コマンドで作ろう
さて、これでアプリケーション起動が確認出来ましたが、GUIではなく以前までと同じくCUIで作りたい人向けにCUIでの実行を書いていきます。
Playの公式に行けば同じことが書いてあるので、詳細はそちら参考にしてください。
まずは環境変数に設定したactivatorが正しく認識されているかを確認するため
activator -help
を実行
 $  activator -help
Usage: activator <command> [options]

  Command:
  ui                 Start the Activator UI
  new [name] [template-id]  Create a new project with [name] using template [template-id]
  list-templates     Print all available template names
  -h | -help         Print this message

  Options:
  -v | -verbose      Make this runner chattier
  -d | -debug        Set sbt log level to debug
  -mem <integer>     Set memory options (default: , which is -Xms1024m -Xmx1024m -XX:MetaspaceSize=64m -XX:MaxMetaspaceSize=256m)
  -jvm-debug <port>  Turn on JVM debugging, open at the given port.

  # java version (default: java from PATH, currently java version "1.8.0_05")
  -java-home <path>  Alternate JAVA_HOME

  # jvm options and output control
  -Dkey=val          Pass -Dkey=val directly to the java runtime
  -J-X               Pass option -X directly to the java runtime
                     (-J is stripped)

  # environment variables (read from context)
  JAVA_OPTS          Environment variable, if unset uses ""
  SBT_OPTS           Environment variable, if unset uses ""
  ACTIVATOR_OPTS     Environment variable, if unset uses ""

In the case of duplicated or conflicting options, the order above
shows precedence: environment variables lowest, command line options highest.
しっかりと認識されていますね。
出来ていない場合は設定を見直してください。
次にactivatorコマンドで任意の場所にプロジェクトを作成します。
activator new [アプリ名] [テンプレート]
今回はplay-scalaで試します。
play-javaと指定すればjavaで作成されます。
$ activator new my-first-app-scala play-scala

Fetching the latest list of templates...

OK, application "my-first-app-scala" is being created using the "play-scala" template.

To run "my-first-app-scala" from the command line, "cd my-first-app-scala" then:
/Users/nemui_fujiu/Documents/works/desktop/workspace/my-first-app-scala/activator run

To run the test for "my-first-app-scala" from the command line, "cd my-first-app-scala" then:
/Users/nemui_fujiu/Documents/works/desktop/workspace/my-first-app-scala/activator test

To run the Activator UI for "my-first-app-scala" from the command line, "cd my-first-app-scala" then:
/Users/nemui_fujiu/Documents/works/desktop/workspace/my-first-app-scala/activator ui
ちなみにjavaのテンプレートはこちら
activator new my-first-app-java play-java
作成できたら、プロジェクトへ移動して実行してみましょう。
cd my-first-app-scala
$ activator
[info] Loading project definition from /Users/nemui_fujiu/Documents/my-first-app-scala/project
[info] Updating {file:/Users/nemui_fujiu/Documents/my-first-app-scala/project/}my-first-app-scala-build...
[info] Resolving org.fusesource.jansi#jansi;1.4 ...
[info] Done updating.
[info] Set current project to my-first-app-scala (in build file:/Users/nemui_fujiu/Documents/my-first-app-scala/)
[my-first-app-scala] $
これで以前からおなじみのconsoleが起動できました。
続いてプロジェクトの起動です。
起動はrunコマンドをよういて行います。
[my-first-app-scala] $ run
[info] Updating {file:/Users/nemui_fujiu/Documents/my-first-app-scala/}root...
[info] Resolving jline#jline;2.11 ...
[info] Done updating.

--- (Running the application from SBT, auto-reloading is enabled) ---

[info] play - Listening for HTTP on /0:0:0:0:0:0:0:0:9000

(Server started, use Ctrl+D to stop and go back to the console...)
これで立ち上がりました。
ではアクセスしてみましょう
http://localhost:9000
GUIで起動したTOP画面と同じ画面が表示されればOKです。
console操作はLogにも出ていますが、以前と同じように「Ctrl+D」でアプリケーションを停止させられます。
と行ったところで今回はここまで、次回はもうちょっとActivatorの説明をします。
その次の回あたりから実装に入ります。
またそのうちに。


CONTACT
お問い合わせ
あなたの「想い」に挑戦します。
どうぞお気軽にお問い合わせください。
受付時間:平日9:00〜18:00 日・祝日・弊社指定休業日は除く